HTML-формы. HTML Формы
Login form templates aren’t there just to look beautiful, they need to be simpler and more efficient to fill out. There are many ways to design login forms. But finding the right solution for the job can be a painstaking task. To help you create great looking login page templates quickly, here are some most interesting HTML, CSS techniques that you can easily follow. Just download the template source and test it all by yourself for free!
Free Login/Register Templates
Login & Register Form
Kill two birds with one stone… The form will switch from login to register, and back, based on if the user is already “registered”. Find “registered” users in the js panel.
A simple Login Form template with Flat UI…
Disqus Like Sign-in form
Slick login form with HTML5 & CSS3
A clean and simple login form template with a round submit button and elegant focus states.
Nice and Simple Login Form
A nice and simple HTML/CSS login form template. It uses wordpress’s login system.
CSS3 Login Form Template
An amazing css3 login form template with only html, css features being used. Download and use this as you like.
Flat UI Login Form
Animated Form Switching with jQuery
A simple animated form switch with three very common forms. The idea is not to leave the page when the user goes to another form but instead make the new form appear within the same container, expanding or contracting to the dimensions of the new form.
Slick Login Form With CSS3
A minimal and slick login form template using basic HTML5 and enhancing it with some CSS3 techniques.
Pure CSS Login Form
Simple and effective dropdown login box
In this article, you will learn how to create a good looking dropdown login form template using CSS3 and a bit of jQuery.
Login Form Template with HTML and CSS
Just a simple and flat login form template…
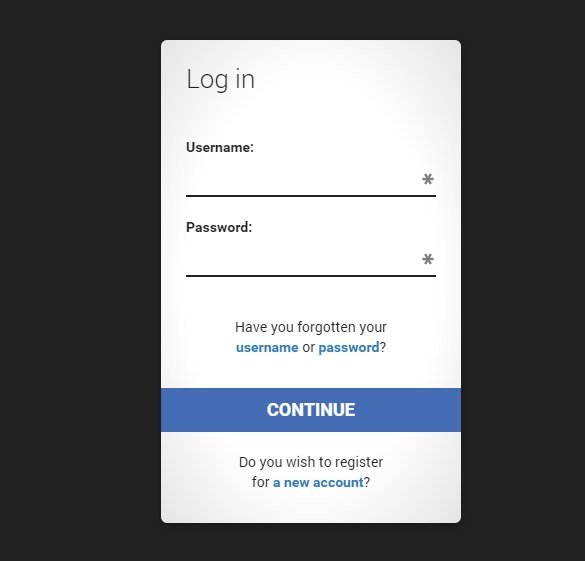
Login
Flat UI Login Form
Custom Login Form Styling
In this tutorial we will create some modern and creative login forms using some interesting CSS techniques and HTML5 goodness.
Login Form with PHP, JQuery and CSS3
Creating an elegant login page using CSS3, Jquery + Ajax and processed by PHP.
Login/Register form with pass metter
Apple-like Login Form with CSS 3D Transforms
In this tutorial we will see how we can use the transforms to create an interesting flipping effect on an Apple-inspired form.
Login Form (Coded)
This freebie is a professional login form. The download includes the PSD file, and xHTML, Js and CSS files as well. You can use it in anyway you want. It involves some nice effects using CSS3 and javascript and I hope you enjoy it!
Login
Login form using HTML5 and CSS3
This is an example how to create a simple login form using HTML5 and CSS3.
Do you have a website? If your answer to this question is yes
,
then a classic must have is an attractive login form. Be it a social networking site or an online fashion store, an email site or an online magazine, the first thing that catches the eye of the customer is the login option. So, why not let your customer get the desired impression in the first contact. Download and get the look for your website that creates an everlasting first impression.
Helpful Articles:
HTML5 Tutorial – Creating Easy HTML Login Form using CSS!
White Transparent HTML Login Form Template
Login Form – Orange Skin Type is an easy to use login form template with its PSD ready to be converted into CSS. It comes with various styles for buttons and is highly customizable.
Basic Login Form Template Free HTML

8 Modern & Web 2.0 Login/Signup Panels is a set of login forms with a futuristic feel to it with quirky and out of the box designs. These forms come in layered PSDs and are highly editable. Source: codepen.io
Black Skin HTML Login Form Template

With sleek and smart design, Modern Login & Register Forms looks very appealing. The smart objects and shapes in the PSD are easily editable making this template highly flexible and adjustable to your needs.

Day/Night Login Page is a very charming HTML login template that comes in two variations. Brightly colored buttons against a dark or a white background are very eye catchy and this template is easily editable.
Login / Registration Form with Password Meter

This template comes with password meter and features a perfectly transparent layout with minimal designing effects. They feature a pinkish shade for the background. They come with a customizable login page. The design is based on single PSD layer that makes it easily editable. The texts are also editable and come with Google Web Fonts.
Batman Styled Dark CSS3 Login Form Download

With darker appearance, this designer template features perfectly editable CSS3 login form with simplistic design. Perfectly responsive, this template work finer in any device, mobile or desktop. It is printable and can be customized as per the requirement. A niche login form design, this template is perfect to be used for corporate and professional WordPress sites.
Simple HTML5 Login Form Sample Source Code
These forms are perfectly responsive and assures easy, with simple nice layout. They also have a darker background with white login form to start with. This template is best for including and contact pages in websites. Their appearance makes them perfectly apt for any website settings. It is fully editable.
8 Modern HTML Login Signup Panels

With an extremely niche layout, this template features 8 modern HTML based signup panels. It has a white layout with very unique designing structures integrated perfectly to create amazing effects for login forms. It is totally responsive and can be edited as per requirement. It is perfect for commercial as well blog sites.

Absolutely simple and basic template files, they can be easily customized and promises to be browser friendly. The template works absolutely fine with any device, big or small, laptop or tablet, smart phone or desktop. It features easy login page in html option. Google Login tool has been integrated. Access Google account using email and password.
How to Use Custom Login Form in Your Website
Creating a custom login form for your WordPress website is quite easy with the latest themes and templates. These are fully customizable and editable. Now edit the login logo to make it more attractive. Replace the logo with your brand icon. It helps in the branding part and depicts a clear message the visitors. There are several plugins available that help in creating customized login form for your website. These plugins are easy to install and helps in providing the most innovative login pages that promises fully editable and responsive for your website. Using custom login form in your website just gets easier.
How to Design / Create Login Form in HTML
It is really important to business to have a nice and creative login form. This is the first point of contact for many customers and hence a lot of efforts should go in creating a perfect design login form. It is possible to code the entire webpage in HTML and there are also Free HTML5 & CSS3 Login Forms Downloads that are available on the web. These templates can be used with little modification and it saves a lot of time and efforts while designing any page. Some may prefer using the paid templates for the web designing and others may simply resort to creating it from scratch.
HTML Day, Night Login Page Template

Very unique login page with day night settings, this template are fully responsive and promises cross browser compatibility. It is perfectly niche in terms of design layouts and button configurations. It comes with several social login options through twitter, Facebook, and Google+. This template feature sample forms that can be easily customizable.
Horizontal Responsive Login Form UI Design

This template features a horizontal layout and promises to be 100% responsive which makes them perfectly accessible to desktops as well smartphone devices. It can be customized without any problem. It comes with a cool sky blue layout, comprising of dropdown and radio buttons. It is perfectly apt for personal registration forms and blog sites.
Beautiful Login Form with New HTML5 Attributes

With minimalistic and simple designing interface, this template login form is perfect for modern day websites. This template feature layered PSD files and comes with easy customizable features. There are wide ranges of HTML5 attributes that makes it so special and unique. It is perfectly compatible with mobile devices like smartphone and tablets. you may also see .
HTML Coded Login Form Template

Source: premiumfreebies.eu | This HTML template has simple interface and comes with minimalistic designing layout. It is compatible with different browsers and offer easy and fast loading. It promises to be printer friendly. Some of the features include Google web fonts, sliced PSD, dropdown menu, customizable color theme, favicon, and social sharing options.
Dark HTML Login Form Template

This template features quite a darker appearance. But it has a sober and niche layout that promises to offer easy navigation through the sections. 100% responsive and can be customized easily, this template are best suited for entertainment and magazine portals. It is feature rich and easy on the eyes.
Beautiful CSS3 Login Form Template

This is a very elegantly designed and niche templates for forms and login pages. The registration form template html css free download is responsive and works perfectly fine with any browser, be it IE, Chrome, or Safari. It has a retina ready display and promises to offer smooth navigation. It feature social sharing options installed at the home page.
Clean Design HTML Login Page

Extremely niche layout, this template has dark shades with social sharing options integrated at the home page. Fully customizable, this template can work easily with any browser and device. It features dropdown menu and password remember button. It also offers fast loading option and promises to be printer friendly. It comes with editable coding files.
HTML & CSS Login Form Template Using Asp.Net
 Some programmers also use C# language for creating the HTML Login Page. The programming language offers a lot of versatility to the programmers and it is also easy to compile the login form with help of C#.
JQuery Mobile Login Form Wedget Template

Admin Login/Sign in Form with PHP Template

We will style it using CSS3 and an icon font. The idea behind this demo is to show the user the login form and provide a link to “switch” to the registration form.
Note that this is for demo purpose only, it will only work in browser supporting the:target pseudo class, and you should not use this code on a live website without providing solid fallback.
In the following, we will be going through Demo 1.
The HTML
In the HTML, we will put both forms, hiding the second one with CSS. Here is the code, I’ll explain some of the interesting parts later.
We’ve added some HTML5 goodness here and used some of the new inputs. The input type=password
automatically hides what the user is typing and replaces it with dots (depending on browser). The input type=email
enables the browser to check if what the user entered has the format of a valid email address. We’ve also used the require=required
attribute; browsers that support this attribute will not let the user submit the form until this field is filled, no JavaScript required.
The autocomplete=on
attribute will prefill values based on earlier user input. We also used some nice placeholders for the inputs that will show some guiding value when the input is not filled.
Now the two tricky parts. You might have noticed the two links at the top of the form. This is a little trick that will make our form behave nicely when playing with anchors, so that it won’t “jump” on long pages when we click on the switching link and trigger the:target pseudo-class.
The second little trick is related to the use of the icon font. We will be using a data-attribute to display the icons. By setting data-icon=”icon_character” with the according character in the HTML we will just need one CSS attribute selector to style all the icons. Read more about this technique on 24 Ways: Displaying Icons with Fonts and Data- Attributes .
The CSS
For the clearness of the code in this tutorial, I will omit all the vendor prefixes, but you will, of course, find them in the files. Once again, I’m using some pretty advanced CSS3 tricks that might not work in all browsers. Let’s get started.
Styling both forms using CSS3
First, let’s give our two forms some general styling for the container.
#subscribe, #login{ position: absolute; top: 0px; width: 88%; padding: 18px 6% 60px 6%; margin: 0 0 35px 0; background: rgb(247, 247, 247); border: 1px solid rgba(147, 184, 189,0.8); box-shadow: 0pt 2px 5px rgba(105, 108, 109, 0.7), 0px 0px 8px 5px rgba(208, 223, 226, 0.4) inset; border-radius: 5px; } #login{ z-index: 22; }
We’ve added a nice box shadow that’s made of two shadows: an inset one to create the inner blue glow, and an outside shadow. We’ll explain the z-index in a bit.
In the following we will style the header with some background clipping:
/**** general text styling ****/ #wrapper h1{ font-size: 48px; color: rgb(6, 106, 117); padding: 2px 0 10px 0; font-family: "FranchiseRegular","Arial Narrow",Arial,sans-serif; font-weight: bold; text-align: center; padding-bottom: 30px; } /** For the moment only webkit supports the background-clip:text; */ #wrapper h1{ background: -webkit-repeating-linear-gradient(-45deg, rgb(18, 83, 93) , rgb(18, 83, 93) 20px, rgb(64, 111, 118) 20px, rgb(64, 111, 118) 40px, rgb(18, 83, 93) 40px); -webkit-text-fill-color: transparent; -webkit-background-clip: text; } #wrapper h1:after{ content:" "; display:block; width:100%; height:2px; margin-top:10px; background: linear-gradient(left, rgba(147,184,189,0) 0%, rgba(147,184,189,0.8) 20%, rgba(147,184,189,1) 53%, rgba(147,184,189,0.8) 79%, rgba(147,184,189,0) 100%); }
Note that at this moment only webkit browsers support background-clip: text , so we will create a stripped background only for webkit here, and clip it to the text to add the stripes to the H1 title. Since the background-clip: text property currently only works in Webkit browsers, I decided to go only with the webkit prefix. That’s the reason why I split the CSS declaration into two parts, and use a webkit prefixed gradient only. Only using the –webkit- prefix is bad practice, it’s only for demo purpose, and you should never do this on real a website! That’s also where the -webkit-text-fill-color: transparent comes in handy: it enables us to only have a transparent background on the webkit browsers, all the other ones will ignore it and give us the provided text color fallback.
We also created a fading line under the title with the help of the:after pseudo-class. We use a 2px height gradient and fade the background to 0 opacity at both ends.
Now let’s style our inputs and give them a nicer look.
/**** advanced input styling ****/ /* placeholder */ ::-webkit-input-placeholder { color: rgb(190, 188, 188); font-style: italic; } input:-moz-placeholder, textarea:-moz-placeholder{ color: rgb(190, 188, 188); font-style: italic; } input { outline: none; }
First we style the inputs, and remove the outline. But be careful here; the outline helps the user know which input is focused, so if you remove it, you should provide some:active and:focus states for the inputs.
/* all the input except submit and checkbox */ #wrapper input:not(){ width: 92%; margin-top: 4px; padding: 10px 5px 10px 32px; border: 1px solid rgb(178, 178, 178); box-sizing: content-box; border-radius: 3px; box-shadow: 0px 1px 4px 0px rgba(168, 168, 168, 0.6) inset; transition: all 0.2s linear; } #wrapper input:not():active, #wrapper input:not():focus{ border: 1px solid rgba(91, 90, 90, 0.7); background: rgba(238, 236, 240, 0.2); box-shadow: 0px 1px 4px 0px rgba(168, 168, 168, 0.9) inset; }
Here we used the:not pseudo class, to style all inputs, except the checkbox. I provided a:focus and:active state, since I decided to remove the outline.
And now the fun part: the icon font. Since we can’t use:before and:after pseudo classes on inputs, we’ll have to cheat a little bit: we’ll add the icon to the label, and then place it in the input. I’m using the fontomas library which puts together some nice icons. You can rearrange them to set the icon to a specific letter. Remember the data-icon attribute? It’s where you should put the letter. I used data-icon=’u’ for user, ‘e’ for email, ‘p’ for password. Once I chose the letters, I downloaded the font, and used the fontsquirrel font generator to transform it into a @font-face compatible format.
@font-face { font-family: "FontomasCustomRegular"; src: url("fonts/fontomas-webfont.eot"); src: url("fonts/fontomas-webfont.eot?#iefix") format("embedded-opentype"), url("fonts/fontomas-webfont.woff") format("woff"), url("fonts/fontomas-webfont.ttf") format("truetype"), url("fonts/fontomas-webfont.svg#FontomasCustomRegular") format("svg"); font-weight: normal; font-style: normal; } /** the magic icon trick ! **/ :after { content: attr(data-icon); font-family: "FontomasCustomRegular"; color: rgb(106, 159, 171); position: absolute; left: 10px; top: 35px; width: 30px; }
Yeah, that’s it folks, you don’t need to have a class for each icon. We used content: attr(data-icon) to retrieve the letter from the data-icon attribute, so we only have to declare the font, choose a nice color and position it.
Now let’s style the submit button for both forms.
/*styling both submit buttons */ #wrapper p.button input{ width: 30%; cursor: pointer; background: rgb(61, 157, 179); padding: 8px 5px; font-family: "BebasNeueRegular","Arial Narrow",Arial,sans-serif; color: #fff; font-size: 24px; border: 1px solid rgb(28, 108, 122); margin-bottom: 10px; text-shadow: 0 1px 1px rgba(0, 0, 0, 0.5); border-radius: 3px; box-shadow: 0px 1px 6px 4px rgba(0, 0, 0, 0.07) inset, 0px 0px 0px 3px rgb(254, 254, 254), 0px 5px 3px 3px rgb(210, 210, 210); transition: all 0.2s linear; } #wrapper p.button input:hover{ background: rgb(74, 179, 198); } #wrapper p.button input:active, #wrapper p.button input:focus{ background: rgb(40, 137, 154); position: relative; top: 1px; border: 1px solid rgb(12, 76, 87); box-shadow: 0px 1px 6px 4px rgba(0, 0, 0, 0.2) inset; } p.login.button, p.signin.button{ text-align: right; margin: 5px 0; }
The trick here is to use the box-shadow in order to create some extra borders. You can only use one border, but as many box-shadows as you want. We will use the length value to create a “fake” second white border, 3px wide, with no blur.
Then we’ll style the checkbox, nothing very special here:
/* styling the checkbox "keep me logged in"*/ .keeplogin{ margin-top: -5px; } .keeplogin input, .keeplogin label{ display: inline-block; font-size: 12px; font-style: italic; } .keeplogin input#loginkeeping{ margin-right: 5px; } .keeplogin label{ width: 80%; }
We will style the bottom of the form using repeating linear gradients to create a striped background.
P.change_link{ position: absolute; color: rgb(127, 124, 124); left: 0px; height: 20px; width: 440px; padding: 17px 30px 20px 30px; font-size: 16px ; text-align: right; border-top: 1px solid rgb(219, 229, 232); border-radius: 0 0 5px 5px; background: rgb(225, 234, 235); background: repeating-linear-gradient(-45deg, rgb(247, 247, 247) , rgb(247, 247, 247) 15px, rgb(225, 234, 235) 15px, rgb(225, 234, 235) 30px, rgb(247, 247, 247) 30px); } #wrapper p.change_link a { display: inline-block; font-weight: bold; background: rgb(247, 248, 241); padding: 2px 6px; color: rgb(29, 162, 193); margin-left: 10px; text-decoration: none; border-radius: 4px; border: 1px solid rgb(203, 213, 214); transition: all 0.4s linear; } #wrapper p.change_link a:hover { color: rgb(57, 191, 215); background: rgb(247, 247, 247); border: 1px solid rgb(74, 179, 198); } #wrapper p.change_link a:active{ position: relative; top: 1px; }
Now you’ll notice that we’ve got two nice forms, but we really want only one to show at a time. So now is time for some animations!!
Creating the switching animation
The first thing to do is to hide the second form by setting the opacity to 0:
#register{ z-index: 21; opacity: 0; }
Remember that our login form had a z-index of 22? We will give the second form a z-index of 21, to put it “under” the login form.
And now the really good part: switching the forms using the:target pseudo class. What you really have to understand about:target, is that we will use anchors to make the transition. The normal behavior of an anchor link, is to jump to the target in the page. But we don’t want to jump anywhere, we only want to switch the forms. And here comes our trick using the two links at the top of the page. Instead of directly linking to the second form, and risking getting a “jumping” effect, we actually put the two links at the top of the page and give them display: none . This will avoid any page jump. Credit where credit’s due: I found this trick on CSS3 create (in French).
#toregister:target ~ #wrapper #register, #tologin:target ~ #wrapper #login{ z-index: 22; animation-name: fadeInLeft; animation-delay: .1s; }
So this is what happens: when we click on the Join us
button, we trigger the #toregister. We then do the animation, by using the sibling selector ~ to find our #register element. We use an animation called fadeInLeft
. Since we “hide” the form using zero opacity, we will use an animation that fades in, to make it appear. We’ve also changed the z-index, to make it appear on top of the other form.
The same happens for the other form.
And here is the code for the animation. We are using the CSS3 animation framework from Dan Eden and adapted it for this tutorial.
Animate{ animation-duration: 0.5s; animation-timing-function: ease; animation-fill-mode: both; } @keyframes fadeInLeft { 0% { opacity: 0; transform: translateX(-20px); } 100% { opacity: 1; transform: translateX(0); } }
The form that is “disappearing” will have another animation which will make it fade out to the left:
#toregister:target ~ #wrapper #login, #tologin:target ~ #wrapper #register{ animation-name: fadeOutLeftBig; } @keyframes fadeOutLeft { 0% { opacity: 1; transform: translateX(0); } 100% { opacity: 0; transform: translateX(-20px); } }
You can now use other animations from Dan Eden’s animate.css: just adjust your .animate class and replace the animation names. You will also find some custom animations at the end of the animate-custom.css file.
Well, that’s it folks. I hope you enjoyed the tutorial!
Please note, that in some browsers background-clip: text is not supported. In Internet Explorer 9 the transitions and animations don’t work, so there will be no fancy form switching. In Internet Explorer 8 and below the:target pseudo-class is not supported, so it won’t work at all (you’ll just see the login form).
This is in continuation of the tutorial on making a membership based web site. Please see the previous page for more details.
Download the code
You can download the whole source code for the registration/login system from the link below:
The ReadMe.txt file in the download contains detailed instructions.
The login form
Here is the HTML code for the login form.
Logging in
We verify the username and the password we received and then look up those in the database. Here is the code:
function Login() { if(empty($_POST["username"])) { $this->HandleError("UserName is empty!"); return false; } if(empty($_POST["password"])) { $this->HandleError("Password is empty!"); return false; } $username = trim($_POST["username"]); $password = trim($_POST["password"]); if(!$this->CheckLoginInDB($username,$password)) { return false; } session_start(); $_SESSION[$this->GetLoginSessionVar()] = $username; return true; }
In order to identify a user as authorized, we are going to check the database for his combination of username/password, and if a correct combination was entered, we set a session variable.
Here is the code to look up the username and password.
function CheckLoginInDB($username,$password) { if(!$this->DBLogin()) { $this->HandleError("Database login failed!"); return false; } $username = $this->SanitizeForSQL($username); $pwdmd5 = md5($password); $qry = "Select name, email from $this->tablename ". " where username="$username" and password="$pwdmd5" ". " and confirmcode="y""; $result = mysql_query($qry,$this->connection); if(!$result || mysql_num_rows($result) <= 0) { $this->HandleError("Error logging in. ". "The username or password does not match"); return false; } return true; }
Please notice that we must compare the value for the password from the database with the MD5 encrypted value of the password entered by the user. If the query returns a result, we set an “authorized” session variable, and then redirect to the protected content. If there are no rows with the entered data, we just redirect the user to the login form again.
Access controlled pages
For those pages that can only be accessed by registered members, we need to put a check on the top of the page.
Notice that we are setting an “authorized” session variable in the login code above. On top of pages we want to protect, we check for that session variable. If user is authorized, we show him the protected content, otherwise we direct him to the login form.
Include this sample piece of code on top of your protected pages:
CheckLogin()) { $fgmembersite->RedirectToURL("login.php"); exit; } ?>
See the file: access-controlled.php in the downloaded code for an example.
Here is the CheckLogin() function code.
function CheckLogin() { session_start(); $sessionvar = $this->GetLoginSessionVar(); if(empty($_SESSION[$sessionvar])) { return false; } return true; }
These are the basics of creating a membership site. Now that you have the basic knowledge, you can experiment with it and add new features, such as a “Forgot password” page to allow the user to retrieve or change his password if he forgets it.
Updates
9th Jan 2012
Reset Password/Change Password features are added.
The code is now shared at GitHub .
License

The code is shared under LGPL license. You can freely use it on commercial or non-commercial websites.
No related posts.
Comments on this entry are closed.
Here is an example of Registration form using HTML. Here a programmer can display as many "Text Field" as he/she wants. The name in front of Text Field is called "Label". At the end of the registration form their is a "ADD" button behnd which any desired link can be used. Once clicked it will redirect to that particular destination.
Here is an example of Registration form using HTML. Here a programmer can display as many "Text Field" as he/she wants. The name in front of Text Field is called "Label". At the end of the registration form their is a "ADD" button behnd which any desired link can be used. Once clicked it will redirect to that particular destination.HTML Code for registration form
Here is an example of Registration form using HTML. Here a programmer can display as many "Text Field" as he/she wants. The name in front of Text Field is called "Label". At the end of the registration form their is a "ADD" button behnd which any desired link can be used. Once clicked it will redirect to that particular destination.
In this example we have shown 9 "Text Field". Size of the Text Box can also be changed as per the requirement.
registration.html